
Reviewed · STIRLING & BANNOCKBURN DAY TRIPS
Braveheart (Battle of Stirling Bridge) Tour
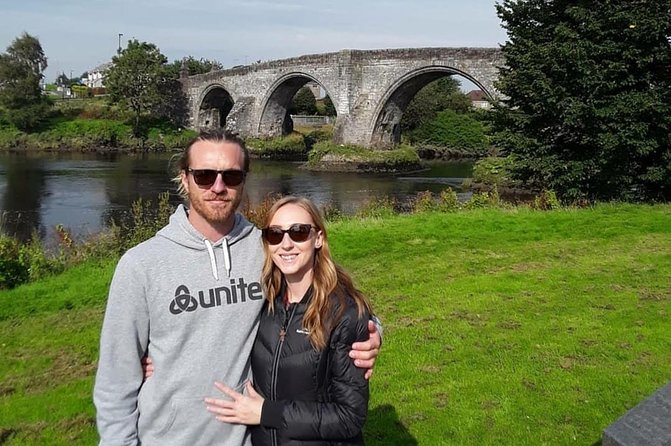
Stirling Bridge packs real punch. This 1 to 1 hour 15 minute small-group walk turns the Battle of Stirling Bridge into something you can picture, from key leaders to the exact bridge spot. You’ll meet right by the Old Stirling Bridge area, and the whole experience is built for close-up history without a classroom vibe.
What I like most is the small group size capped at 15, which makes it easier to ask questions and get direct answers. I also love that the guide anchors the story in physical details, like the old wooden bridge location and what happened to it during the battle, not just general background.
One consideration: it is an outdoor stop and there is some standing involved, so the experience depends on the weather. If you are hoping for lots of walking or big indoor displays, this is more about focus and interpretation than distance.
In This Review
- Key things to know before you go
- Stirling Bridge in 75 minutes: what you actually do
- Meeting at the Old Stirling Bridge area, then stepping into 1297
- The standout moment: the old wooden bridge location and collapse
- Wallace, De Moray, and the guide’s job: make it clear, not cheesy
- Why the small group cap changes the whole experience
- Outdoors, standing, and weather: plan for the practical reality
- How to fit it into your Stirling day (including Bannockburn)
- Price and value: $34.45 for 1 to 1h15 near the bridge
- Who should book this tour, and who might pass
- Should you book the Braveheart (Battle of Stirling Bridge) tour?
- FAQ
- How long is the Braveheart (Battle of Stirling Bridge) tour?
- How many people are in the group?
- Where do I meet for the tour?
- Is there a mobile ticket?
- What language is the tour offered in?
- Do I pay admission for the stop?
- Is the tour mostly walking?
- Can I get a confirmation after booking?
- What is the cancellation policy?
- What happens if the weather is bad?
Key things to know before you go
- Max 15 travelers means you get more personal pacing and more chances to ask questions
- Meet at the Old Stirling Bridge area so you can connect the story to the place quickly
- William Wallace and Andrew De Moray are front and center, with the battle explained in clear steps
- The old wooden bridge site and collapse point are part of the walk so you can visualize the action
- Guides challenge Braveheart-style errors, which helps you separate movie drama from the likely reality
- Short and efficient at 1 to 1h15 makes it easy to fit into a Stirling day
Stirling Bridge in 75 minutes: what you actually do
This tour is short on purpose. In about 1 hour to 1 hour 15 minutes, you will be close to the River Forth and the Old Stirling Bridge area, listening as the battle story is built around what you can see nearby.
You are not getting a slow, meandering walk across town. Instead, expect a tight sequence: set the scene, meet the key players, then return to the bridge area to connect the battle to the ground under your feet. The format works well if your day is packed, or if you simply want your Scottish history without a long time commitment.
Most people can participate, and the walking is limited. That said, you will likely spend some time standing. If you have mobility needs, wear stable shoes and plan for a bit of time on your feet.
More ground covered at Stirling and Bannockburn:
- Stirling Old Town Daily Walking Tour (11am & 2pm)★ 5.0 · 279 reviews
- Bannockburn Battlefield Tour★ 5.0 · 36 reviews
- 3 Hour Private Tour of Stirling Old Town and Stirling Castle★ 5.0 · 17 reviews
- Stirling Castle Whisky and The Kelpies Tour★ 5.0 · 9 reviews
Meeting at the Old Stirling Bridge area, then stepping into 1297
The meeting point is at Stirling Old Bridge, River Forth, Stirling FK8 1AQ. It ends back at the same spot, so you do not need to worry about transportation between “start here” and “finish there.”
A big part of the value here is timing. You arrive right where the story happened, so the guide can point, explain, and connect each moment to the geography. If you are the type who needs to see the place while you hear the story, this setup makes it easier to follow.
You will hear the early arc of the conflict, tied to the rise of figures like William Wallace and Andrew De Moray. The tour also covers how these leaders went from early days to becoming central figures in Scotland’s fight for independence. Even if you only know a few names, the guide’s flow is designed to help you build the timeline without getting lost.
The standout moment: the old wooden bridge location and collapse
The tour’s anchor is physical: the guide shows you where the old wooden bridge from the 1297 battle was likely located, and where it collapsed during the fighting.
That matters because Stirling Bridge is easy to romanticize from afar. But when you can picture the bridge position and its failure point, the battle stops being abstract. You start understanding how a small change in terrain or crossing access could swing momentum in a fight.
Also, there is no “nothing left here” feeling. Even though the original bridge does not survive in the same way, the tour focuses on informed interpretation of the location. If you like maps, models, or any kind of visual aid, pay attention when the guide pulls out those details, including references to possible locations that account for new information.
Wallace, De Moray, and the guide’s job: make it clear, not cheesy
The leaders are not just name-dropped. You get context for why they matter in the story of Scottish independence, and you get the battle framed in a way that makes sense.
One fun detail, delivered with a knowing wink: the tour uses a joke about an “Andy Murray” figure to point you toward the idea of the Guardians of Scotland. It is the kind of moment that makes the history feel less stuffy, while still staying anchored to the relevant people in the period.
Another major strength is correction. The guide explicitly works to debunk Braveheart inaccuracies, especially the parts that can get stuck in people’s heads. If you came with movie memories, this tour helps you reset expectations with better framing.
What Stirling keeps behind the bar
- Private Stirling Old Town Tour
★ 5.0 · 8 reviews - Private Tour of the Highlands, Glencoe and Castles from Stirling
★ 5.0 · 7 reviews - Stirling Run Tour
★ 5.0 · 7 reviews - Stirling Castle and the Secrets of the Old Town Private Tour
★ 5.0 · 6 reviews
Why the small group cap changes the whole experience
With a maximum of 15 travelers, the tour avoids the “walk and listen, ask nothing” trap. You can usually get direct answers when you want them, and the pace stays human.
That is not just comfort. It helps the guide tailor explanations. If you do not know much about the Wars of Independence, you will still get the foundation. If you already have some background, you can ask sharper questions about locations, interpretations, or why the story gets told in certain ways.
The small group also seems to support a more welcoming tone. The guide experience is repeatedly described as friendly and enthusiastic, and that shows up in how the tour flows. You get more of a “come on, let’s figure this out together” feeling than a strict lecture.
Outdoors, standing, and weather: plan for the practical reality
This is an outdoor walking experience. You should expect the pace to be manageable, but it is still weather dependent. The tour requires good weather, and if it is canceled due to poor weather you are offered a different date or a full refund.
What to do with that information: pack like you are walking by a river. Even in decent conditions, bring a layer you can add or remove. If you tend to get cold standing still, consider a hat or something for wind. Short tours go fast, but you still feel the weather when you are waiting for explanations near the river.
How to fit it into your Stirling day (including Bannockburn)
If you are doing both Stirling Bridge and Bannockburn the same day, this tour length is helpful. At about 1 to 1h15, you can pair it with other nearby history without your whole day getting dragged into the “one more stop” trap.
In practice, that pairing works because both sites connect to the same larger theme: Scotland’s fight for independence and the way these battles shaped national identity. The value is not repetition. It is contrast: Stirling Bridge focuses on crossing, leaders, and the key turning moments, while Bannockburn shifts to a different set of battlefield dynamics.
If your schedule is tight, this is also a good way to “lock in” the most important story beats around Stirling without overcommitting.
Price and value: $34.45 for 1 to 1h15 near the bridge
At $34.45 per person, the main value is not cost-cutting. It is focus.
You are paying for:
- a guided explanation tied to one specific location
- a small group size capped at 15
- a short, efficient format you can build into a busy itinerary
- clear interpretation, including corrections to popular movie misconceptions
Because it is a compact tour, you do not pay for time sitting on a bus or roaming far from the story. And at the stop itself, admission is free, which helps keep the day’s overall spend predictable.
Compared with bigger, longer walking tours, this one feels like a “targeted hit.” If your goal is understanding the Battle of Stirling Bridge in a way you can remember later, the price-to-time ratio feels fair.
Who should book this tour, and who might pass
This tour is a strong match if you:
- want a short history stop that you can actually visualize
- enjoy stories tied to real terrain, not just timelines
- already know a bit about Wallace and want better context
- care about sorting movie myths from likely reality
- prefer small groups and Q and A instead of a crowd shuffle
You might skip or adjust expectations if you:
- want long walking routes or lots of sites
- expect major museums or indoor interpretation
- are extremely weather sensitive, since it’s outdoors and standing is involved
- need very predictable punctuality on the dot, because like any small operator, the experience depends on the guide being there on time
One practical tip: if you arrive early, stay within the immediate meeting area, then give a reasonable window before taking action. This is a short tour, so timing matters.
Should you book the Braveheart (Battle of Stirling Bridge) tour?
I would book it if Stirling is on your map and you want the Battle of Stirling Bridge explained in a way that connects to where you stand. The combination of small group size, the focus on Wallace and De Moray, and the emphasis on the actual old bridge location and collapse point makes it far more memorable than a generic “here’s what happened” talk.
Skip it only if you dislike outdoor standing, or if you want a long, multi-stop walking day. Otherwise, this is a good value, focused experience that helps you understand Scotland’s independence story at the exact place where it matters.
FAQ
How long is the Braveheart (Battle of Stirling Bridge) tour?
It lasts about 1 hour to 1 hour 15 minutes.
How many people are in the group?
The tour caps at a maximum of 15 travelers.
Where do I meet for the tour?
The meeting point is Stirling Old Bridge, River Forth, Stirling FK8 1AQ, UK.
Is there a mobile ticket?
Yes, the tour uses a mobile ticket.
What language is the tour offered in?
It is offered in English.
Do I pay admission for the stop?
The tour stop at Stirling Bridge lists admission ticket as free.
Is the tour mostly walking?
There is not a lot of walking, but you will likely stand for a little while.
Can I get a confirmation after booking?
Yes, confirmation is received at the time of booking.
What is the cancellation policy?
You can cancel up to 24 hours in advance for a full refund. If you cancel less than 24 hours before the start time, the amount paid is not refunded.
What happens if the weather is bad?
This experience requires good weather. If it is canceled due to poor weather, you will be offered a different date or a full refund.
The newest pours out of Stirling

Stirling & Bannockburn Day Trips, compared.
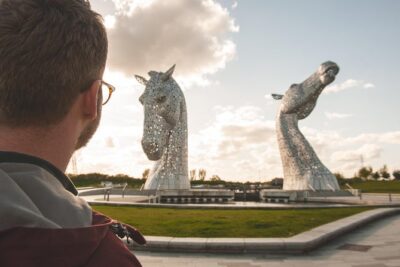
Loch Lomond, Kelpies & Stirling Castle Tour Including Admission
Read our review →
Loch Lomond, Stirling Castle and the Kelpies Day Tour
Read our review →
Rosslyn Chapel, Dunfermline Abbey and Stirling Castle Day Tour
Read our review →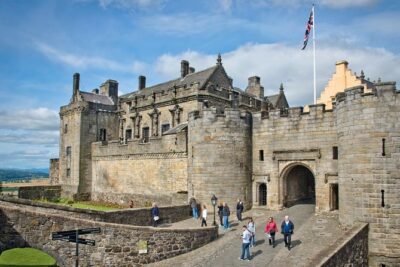

Stirling Castle, Loch Lomond and Cruise Day Tour from Glasgow
Read our review →
Stirling Castle and Whisky Very Small Group Tour from Edinburgh
Read our review →
Stirling Old Town Daily Walking Tour (11am & 2pm)
Read our review →Browse the lists this tour appears in